Portico68 Black Label - Build Kit
65%
Hot Swap
Buy From:
TheKeyDotCo
$159.99
€151.22
£131.14
Vendor Description:
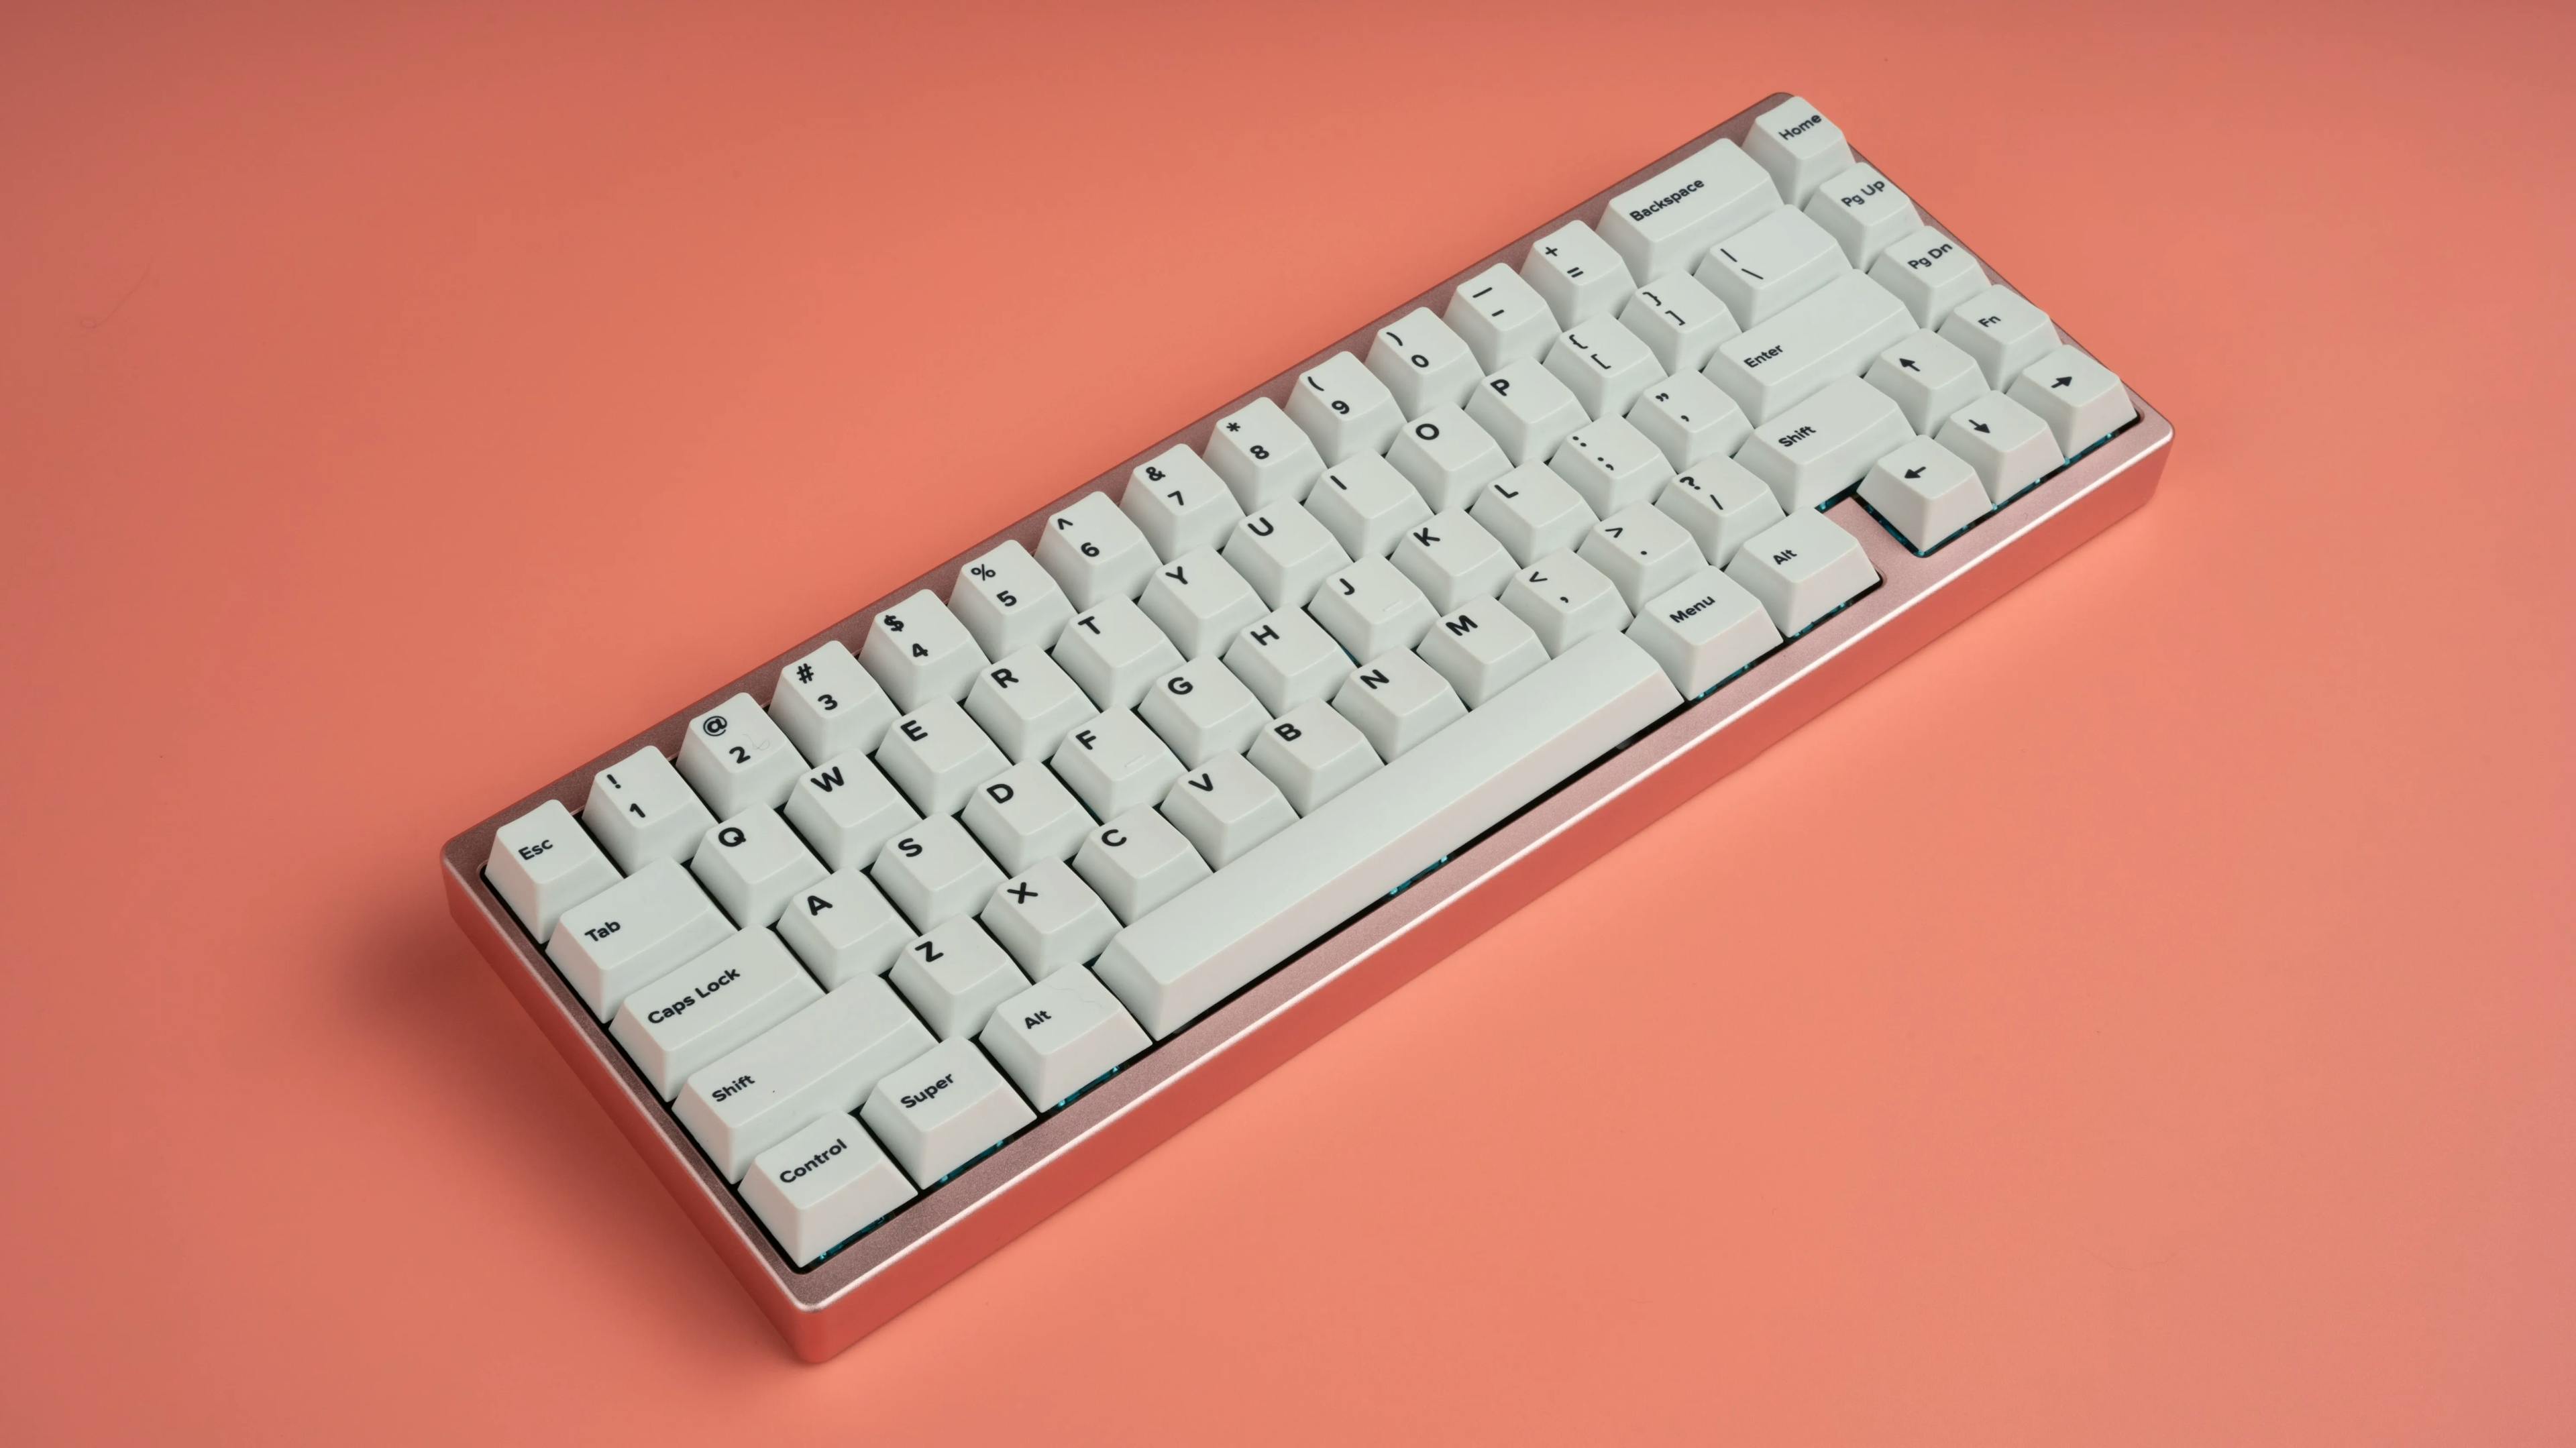
<p><strong>Welcome to your gateway into mechanical keyboards</strong>. Portico68 Black Label is our premium entry-level keyboard designed to give you the perfect balance between form and function. It has an anodized aluminum case and a compact 65% keyboard layout.<br></p>
<p>🌟 <strong>Hotswap PCB</strong> – No soldering! It's easy to build the keyboard and change switches when you want.</p>
<p>🛠️ <strong>Assembly Required</strong> – Building the Portico68 will take you 60–90 minutes. We've designed this to be a perfect starting place if you've never built a keyboard before. We've created a <a href="https://thekey.company/pages/portico-build-tutorial">Build Tutorial</a> with photos to walk you through every step.<br></p>
<p>⚠️ <strong>Switches and keycaps are not included.</strong> You'll need to buy these separately. </p>
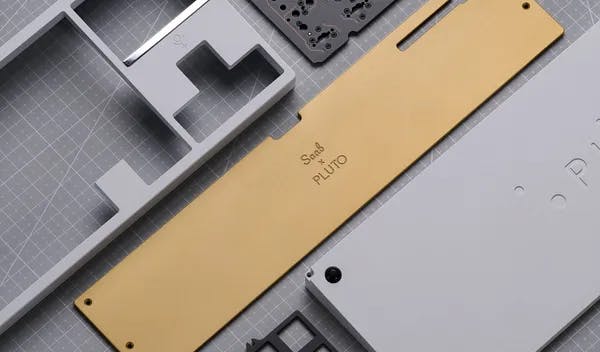
<p><strong>Download the <a href="https://cdn.shopify.com/s/files/1/1679/2319/files/Portico68Plate.dxf?v=1645816676">plate file →</a></strong></p>
<p><em>Product images are photographs. </em></p>
<h2>Specs</h2>
<p><strong>Premium Anodized case colors</strong></p>
<ul>
<li><span>Rosé</span></li>
<li><span>Obsidian</span></li>
<li><span>Bombay</span></li>
<li><span>Angora (e-white)</span></li>
</ul>
<p>Typing angle: 7 degrees</p>
<p><strong>Plate</strong></p>
<ul>
<li>Mounting style: Gasket-mounted, for a luxurious and cushioned typing feel</li>
<li>Plate material: FR4</li>
<li>Plate thickness: 1.5mm</li>
</ul>
<p><strong>PCB</strong></p>
<ul>
<li>Hot swap – no soldering required. It's easy to insert and change switches.</li>
<li>In-switch RGB. <em>Note: these are not individually addressable.</em><br>
</li>
<li>Compatible with <a href="https://caniusevia.com/">VIA</a>
</li>
<li>USB-C connection. Includes a starter black cable.</li>
</ul>
<p><strong>Stabilizers</strong></p>
<ul>
<li>Screw-in, PCB-mounted stabilizers</li>
<li>Housings: includes 5 sets</li>
<li>Wires: includes four 2u wires and one 6.25u wire</li>
<li>Made by C³Equalz<br>
</li>
</ul>
<h2>What's Included</h2>
<p>When you buy Portico68 Black Label, you'll get:</p>
<ul>
<li>Case (top and bottom pieces)<br>
</li>
<li>PCB<br>
</li>
<li>Plate <br>
</li>
<li>Silicon dampening mat<br>
</li>
<li>Felt dampening mat<br>
</li>
<li>Standoffs<br>
</li>
<li>Screws</li>
<li>USB-A to USB-C cable</li>
<li>V3 Stabilizers</li>
</ul>
<p><strong>Switches and keycaps are not included.</strong> You'll need to buy these separately. <br></p>
<h2>Assembly Guide</h2>
<p>Portico68 Black Label is a keyboard kit. You will have to assemble it yourself. You'll also need to buy separately:</p>
<ul>
<li>Switches (x67)</li>
<li>Keycaps<br>
</li>
</ul>
<p>Assembling a complete Portico68 keyboard will take around 60–90 minutes. See our written <a href="https://thekey.company/pages/portico-build-tutorial">Build Guide</a>, complete with photos, for a walkthrough of every step.<br></p>
<div style="text-align: left;" data-mce-style="text-align: left;"><br></div>
<h2>Keymap and RGB Settings</h2>
<p>The default Portico68 layout can be adjusted in <a href="https://caniusevia.com/">VIA Configurator</a>.</p>
<p>You can adjust the RGB settings by holding down the Layer key (the key immediately to the right of the spacebar) and pressing:</p>
<ul>
<li>Q - RGB toggle on/off</li>
<li>W - RGB mode cycle</li>
<li>E - RGB hue increase</li>
<li>R - RGB hue decrease</li>
<li>T - RGB saturation increase</li>
<li>Y - RGB saturation decrease</li>
<li>U - RGB brightness increase</li>
<li>I - RGB brightness decrease</li>
<li>A - RGB effect speed increase</li>
<li>S - RGB effect speed decrease<img data-mce-fragment="1" src="https://cdn.shopify.com/s/files/1/1679/2319/files/portico68-v2_keymap_480x480.png?v=1651941039" alt="" data-mce-src="https://cdn.shopify.com/s/files/1/1679/2319/files/portico68-v2_keymap_480x480.png?v=1651941039">
</li>
</ul>
<h2>Common Questions</h2>
<p><strong>Is this easy to build for beginners?</strong></p>
<p>Yes! We designed this specifically for folks who have never built a keyboard before. You have to be mindful of small parts like screws, and check that things work, but it’s a straight forward process that anyone can do. A brief summary of steps is:<br></p>
<ol>
<li>Assemble and attach the stabilizers to the PCB.</li>
<li>Screw together the plate and the PCB.</li>
<li>Put this into the case, and screw it together,</li>
<li>Insert switches.</li>
<li>Put on keycaps.</li>
</ol>
<p>And you’re done! You can get the full rundown in our <a href="https://thekey.company/pages/portico-build-tutorial">Build Guide →</a><br></p>
<p><b>How do I configure the keymap?</b></p>
<p><span style="font-weight: 400;" data-mce-style="font-weight: 400;">Portico is compatible with <strong>VIA Configurator</strong>, which is an easy to use app. You click to change what keypresses do, and changes take place instantly—you don’t need to flash your keyboard to apply the changes.</span></p>
<p><span style="font-weight: 400;" data-mce-style="font-weight: 400;">Read more about <a href="https://keyboard.university/guides/using-via-configurator">using VIA Configurator →</a></span></p>
<p><b>In addition to this build kit, what else do I need to buy to build a complete keyboard?</b></p>
<p><span style="font-weight: 400;" data-mce-style="font-weight: 400;">You’ll need to buy switches and keycaps.</span></p>
<ul>
<li>
<b>Switches</b><span style="font-weight: 400;" data-mce-style="font-weight: 400;">: Portico68 uses 67 switches and works with MX-style switches. We recommend buying 70+, so that you have a few extra in case a pin gets bent or you lose one.</span>
</li>
<li><span style="font-weight: 400;" data-mce-style="font-weight: 400;"><b>Keycaps</b>: Portico68 has a 65% keyboard layout and is compatible with most custom keycap sets; it doesn’t feature any unusual key sizes. As always, take care to double check the keycaps you’re buying to ensure it would fit on the Portico68 layout!</span></li>
</ul>
<p><b>This layout is missing keys! How do I type them?</b></p>
<p><span style="font-weight: 400;" data-mce-style="font-weight: 400;">You access the missing keys via another “layer” of keys. It's like typing numbers or symbols on your smartphone, or holding 'shift' on your keyboard to type capital letters.<br></span></p>
<p><span style="font-weight: 400;" data-mce-style="font-weight: 400;">For example, to type <strong>F1</strong>, you would press <strong>FN</strong> + <strong>1</strong>. Pressing <strong>FN</strong> toggles the next layer so you can access more keys that aren’t on the default layer.</span></p>
<p><span style="font-weight: 400;" data-mce-style="font-weight: 400;">This can all be configured in <a href="https://keyboard.university/guides/using-via-configurator">VIA</a>.</span></p>
<h2>Sound Test</h2>
<p>If you're interested in hearing what this board sounds like, check out this sound test done by <a href="https://youtu.be/XXh8bLjer7M">dutchmasterw</a>. </p>
<p><strong>His typing video features: </strong></p>
<ul>
<li><span>Keyboard: Portico68 Black Label</span></li>
<li><span>Switches: Dragon Fruit</span></li>
<li><span>Keycaps: JTK Night Sakura</span></li>
</ul>
Similar Products